
Few experiences are as disorienting as returning to a home that has been damaged by fire, flood, or a severe storm. The place that was supposed to be your refuge looks unrecognizable, and the path forward feels overwhelming before you have even taken a single step. The good news is that with the right approach, a clear order of operations, and the right professionals in your corner, restoring your home is absolutely achievable. This guide walks you through the entire process, from your first cautious steps back inside to the final inspection that lets you breathe easy again.
Understanding the Scope of Damage Before You Do Anything Else

Before you move a single piece of furniture or pull up a single floorboard, you need to understand what you are actually dealing with. A careful, methodical first walkthrough is essential, and it should happen only after authorities or your insurance company have confirmed the structure is safe to enter.
Bring your phone and document everything. Walk through every room and record video from multiple angles before touching anything. This footage becomes the foundation of your insurance claim and can mean the difference between full reimbursement and a costly dispute. Photograph damage from multiple distances: wide shots that show the full room and close-ups that capture the specific point of failure.
As you move through the space, train yourself to look past what is obvious. A waterlogged ceiling or a scorched wall is easy to spot. What is harder to identify is whether the floor joists beneath the subfloor have been weakened, whether a load-bearing wall has been compromised, or whether the damage you can see is only the surface of something much deeper. If there is any doubt, do not attempt to assess structural integrity yourself. That is a job for a licensed contractor or structural engineer.
Who to Call in the First 24 Hours
Time is genuinely your enemy in the hours after a disaster. The longer damage goes unaddressed, the more it compounds. Your first call should be to your insurance company to report the claim and get an adjuster scheduled. Your second call should be to a contractor or specialist who can begin emergency stabilization.
When it comes to fire damage restoration, speed matters enormously. Smoke and soot are chemically active and continue to damage surfaces long after the flames are out. Soot is acidic and will etch glass, corrode metal, and permanently stain porous surfaces if it is not treated quickly. This is not a situation where waiting a few extra days to shop around for the best price makes sense. Getting the right people on-site fast protects the parts of your home that are still intact.
Protecting Your Home From Further Damage While You Plan
While you wait for your insurance adjuster and your restoration team to get moving, there is meaningful work you can do to prevent the damage from spreading. If your roof has been compromised, a heavy-duty polyethylene tarp secured properly over the damaged area can prevent rain from turning a bad situation into a catastrophic one. Broken windows and door openings can be boarded up with plywood to prevent weather intrusion and unauthorized entry.
Moisture is your most persistent enemy in the aftermath of a disaster. Water that enters through a damaged roof or broken window does not stay where it lands. It migrates into wall cavities, soaks into insulation, and saturates subfloor materials, all while remaining invisible from the surface. Even a small amount of standing water left unaddressed for 24 to 48 hours can set the stage for serious long-term problems.
Before you or anyone else begins working inside, confirm that utilities have been safely shut off. Gas, electricity, and water should all be turned off at the main shutoff points until a licensed professional has inspected each system and confirmed it is safe to restore service.
Clearing Out the Debris

Once your home has been stabilized and cleared for entry, the cleanout phase begins. This is often emotionally difficult and physically demanding in equal measure. A methodical approach makes it manageable.
Start by sorting everything into three categories: salvageable items that can be cleaned and kept, hazardous materials that require special handling, and general debris that needs to go. A dumpster rental is one of the most practical decisions you can make at this stage. Hauling debris in a pickup truck load by load is time-consuming, and it underestimates how much material a significant home disaster actually generates. Having a large container on-site from day one keeps the work moving efficiently.
As you sort through debris, pay attention to metal components such as appliances, pipes, fixtures, and structural elements that have been removed. Metal recycling is a responsible and sometimes financially worthwhile option for this material rather than sending everything to a landfill. Many scrap facilities accept steel, copper, and aluminum from residential projects, and this reduces the overall volume of waste you are managing.
Tackling Hidden Air Quality Threats You Can’t See
One of the most commonly overlooked aspects of home disaster recovery is what happens to the air inside the structure. Flood water, smoke, and debris all introduce contaminants into the air supply, and those contaminants do not simply disappear once the visible damage has been addressed.
Your HVAC system and the ductwork connected to it are particularly vulnerable. Floodwater can back up into return air ducts. Smoke can coat the interior surfaces of supply lines. Even debris and biological material can find their way into the system during a disaster. Bringing in local duct cleaners who specialize in post-disaster remediation is an important step that many homeowners skip, only to find themselves dealing with persistent odors, poor air quality, and health complaints after they have moved back in.
The role of ventilation in recovery cannot be overstated. Running industrial air movers and dehumidifiers throughout the restoration process actively removes moisture from the air and from building materials. This reduces drying time and, critically, reduces the conditions that allow biological growth to take hold in wall cavities and under flooring.
Identifying and Dealing With Hazardous Materials in Older Homes
If your home was built before 1980, a disaster is not just a structural and cosmetic problem. It is also a potential exposure event. Older construction materials commonly contained substances that were later found to be hazardous, and a fire, flood, or major renovation can disturb those materials and release them into the environment.
Engaging local asbestos removal professionals before any significant demolition or cleanup work begins is not optional if there is any reason to believe the material is present. Asbestos was used in floor tiles, ceiling tiles, pipe insulation, roofing materials, and textured paints. Disturbing it without proper containment and removal protocols creates an airborne hazard that affects everyone on the property.
Similarly, any home that has been through a disaster is worth evaluating for gases that may have been previously undetected. Radon testing is a relatively simple and inexpensive process that can reveal whether a colorless, odorless radioactive gas has been seeping into the lower levels of your home, a risk that is often increased when foundation work or significant structural changes are involved in the restoration.
Addressing Structural and Surface Damage Room by Room
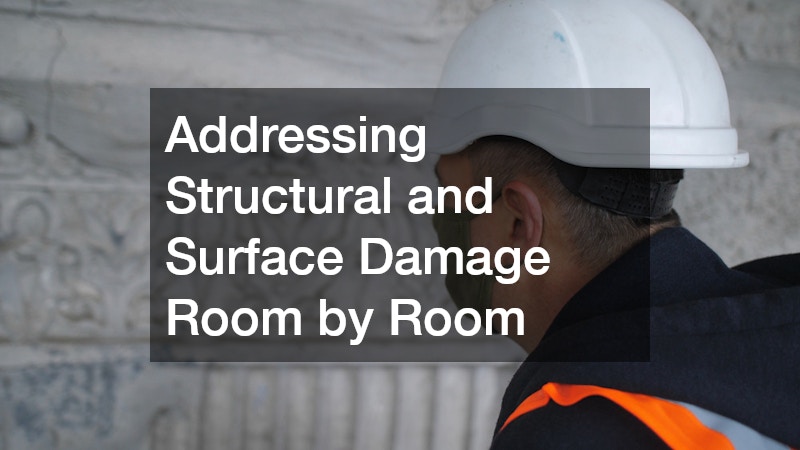
Once hazardous materials have been identified and addressed, and once the air quality situation has been brought under control, the work of assessing and repairing structural and surface damage can begin in earnest. The most effective approach is to work room by room rather than jumping around the house.
Start from the top and work down. Inspect ceilings before walls, and walls before floors. Water damage in particular travels downward, so damage you find in a floor may have originated in the ceiling of the room above. Poke and press surfaces gently to check for softness that indicates water saturation or structural compromise behind the surface.
For flooring, carpet cleaning is sometimes a viable option for salvaging floor coverings that have been affected by smoke or minor water contact, but it is not a universal solution. Carpet and padding that have been saturated with contaminated floodwater typically cannot be adequately restored and should be removed entirely. Hard surface flooring, such as hardwood, may be refinished depending on the degree of warping and staining, while tile and stone are generally more resilient.
Sourcing What You Need to Rebuild Without Overspending
Once you have a clear picture of what needs to be replaced, the procurement phase begins. This is where many homeowners either overspend significantly or create delays by underestimating what they need. Working from a detailed scope of work prepared by your contractor, make a complete list of every material required before you purchase anything.
When buying building supplies in volume for a major restoration, compare prices across multiple suppliers rather than defaulting to the most convenient option. Lumber, drywall, insulation, roofing materials, and fixtures can vary considerably in price between suppliers, and for a large project, those differences add up quickly. Ask your contractor whether they have supplier relationships that might give you access to contractor pricing.
Bringing in the Right Specialists for the Right Jobs
There is a temptation in home restoration to try to manage as much as possible yourself in order to control costs. For some tasks, particularly cosmetic finishing work like painting, that instinct is reasonable. For others, it can create serious problems down the line.
Restoration companies that specialize in disaster recovery bring equipment, expertise, and protocols that are genuinely difficult to replicate without training and experience. Industrial drying equipment, thermal imaging cameras that detect moisture behind walls, and air scrubbers that filter particulate matter from the air are tools that most homeowners do not have access to. More importantly, experienced restoration professionals know how to document their work in a way that satisfies insurance requirements and protects you from disputes later.
Similarly, a qualified mold removal business is not interchangeable with a general contractor who offers to spray some bleach on a problem area. Professional mold remediation involves containment, negative air pressure, proper disposal of contaminated materials, and post-remediation testing to confirm the work was effective. Cutting corners on this step is one of the most common reasons homeowners find themselves dealing with recurring mold problems after a restoration.
The Final Steps Before Calling Your Home Safe Again

As the visible work winds down and your home begins to look like itself again, it is tempting to rush the final stages. Resist that impulse. The last steps of a restoration project are just as important as the first ones.
Work through a formal punch list with your contractor that addresses every outstanding item before any final payment is made. Walk the property together, room by room, and confirm that every agreed-upon task has been completed to the specified standard. Do not sign off on work you have not personally inspected.
Before you move back in, schedule any final inspections or tests that were part of your restoration plan. Confirm that all remediation work has been documented in writing and that you have copies of every report, test result, and certificate associated with the project. These documents protect you if questions arise later, and they may be required if you ever sell the property.
Finally, use this experience to build a simple home maintenance plan that reduces your vulnerability going forward. Inspect your roof annually, keep gutters clear, test smoke and carbon monoxide detectors seasonally, and maintain relationships with the contractors and specialists who helped you through this process. A disaster may be unpredictable, but your preparedness for one does not have to be.
Restoring a home after a disaster is one of the most demanding projects a homeowner can face. It requires patience, organization, and the willingness to ask for professional help when the situation calls for it. By approaching the process systematically, from that first careful walkthrough through to the final inspection, you give yourself the best possible chance of coming out the other side with a home that is not just repaired, but genuinely restored. The process is long, and there will be setbacks. But for homeowners who approach it with clear eyes and a solid plan, the end result is worth every difficult step along the way.

