

For most homeowners, a house represents the largest single investment of a lifetime. Yet, it is startlingly easy to let minor maintenance tasks slip through the cracks. A tiny hairline crack along a window frame, a subtle discolored ring on a basement ceiling, a faint clicking sound when the heater kicks on, or a slow drip under the bathroom sink can easily be brushed off as minor inconveniences to handle “someday.”
In reality, home damage operates on a compounding scale. What begins as a two-dollar washer failure inside a faucet can quietly rot subfloors, ruin drywall, and foster toxic mold colonies behind baseboards over a few short months. A single loose shingle lifted by a spring breeze can allow gallons of rainwater to saturate attic insulation, leading to structural wood rot and costly ceiling repairs.
Adopting a preventative maintenance mindset changes your relationship with your property. Instead of reacting to terrifying structural emergencies or sudden system failures, you take control through active observation and routine micro-fixes. The goal of preventative care is simple: identify minor defects at their earliest stages, correct them with low-cost materials, and preserve the structural integrity and efficiency of your home.
This comprehensive guide serves as your roadmap for mastering preventative home care. By breaking your home down into manageable systems—from the overhead protective shield to the deep underground utilities—you will learn how to spot early warning signs, take decisive action, and know exactly when to bring in targeted professional support before a minor flaw turns into a financial crisis.
Spotting and Patching Early Overhead Moisture Entry
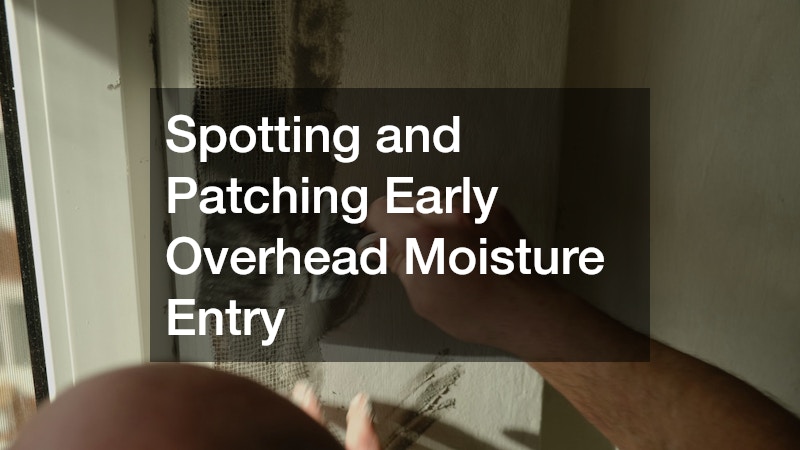
Roof inspections do not require risking your safety on a high ladder every weekend. You can spot the vast majority of emerging overhead issues directly from the safety of your lawn using a good pair of binoculars during early spring and late autumn.
-
Examine Shingle Conditions: Look closely for shingles that are curling at the edges, blistering in the center, or missing entirely. Inspect the dark, gritty asphalt granules that coat your shingles; if you see bald spots or notice excessive dark sand pooling near downspout exits, your shingles are reaching the end of their protective lifespan.
-
Inspect Vulnerable Flashings: Moisture rarely penetrates the center of a flat shingle field first. Instead, it enters through joints and penetrations. Check the thin metal flashing strips around chimneys, skylights, dormers, and plumbing vent pipes. Look for rusted metal, bent edges, or cracked caulking along the top seams.
-
Address Attic Undersides: Clamber into your attic on a bright day with a flashlight. Turn off the light and look up toward the rafters. If you see pinpricks of daylight, water can—and will—follow those same paths during the next heavy storm. Inspect the underside of the roof deck for dark water stains, white powdery efflorescence on wood surfaces, or damp insulation.
-
Apply Emergency Sealants: When you spot a minor gap in flashing or a slightly lifted shingle corner, act quickly. Clean out dirt and dried debris, then apply a generous bead of exterior-grade rubberized flashing cement beneath the lifted edge or along the open metal joint, pressing it firmly into place.
Clearing, Aligning, and Sealing Water Runoff Systems
Your roof shedding water is only half the battle; the second half is channeling that water safely away from your structure. A clogged or misaligned gutter system converts harmless rain into a concentrated torrent that attacks your fascia boards, soffits, and foundation walls.
When gutters clog with autumn leaves, twigs, and shingle grit, standing water accumulates in the metal channels. During winter freeze-thaw cycles, this trapped water expands, twisting the gutter channels, popping fasteners out of the wood, and creating ice dams that force water upward under your lower shingle courses.
Regularly scope out debris from your gutters and flush them with a high-pressure hose nozzle to verify correct pitching. Water should flow quickly toward the downspouts without pooling in low spots. If you notice sagging sections, adjust the metal gutter hangers or drive long gutter screws through internal ferrules directly into the underlying rafter tails.
Fixing small seam leaks is straightforward. Dry the inside of the gutter trough completely, scrape away oxidized paint or old caulk with a wire brush, and coat the interior joint with brushable rubberized gutter sealant. Additionally, attach flexible downspout extensions to ensure water discharges at least six feet away from your foundation. Taking the time to perform routine roof repair tasks alongside maintaining your water drainage channels keeps your home watertight during severe storms. When downspouts or channels are bent, broken, or rusting through, securing a professional local gutter repair restores your exterior drainage system before runoff erodes your foundation walls.
Maintaining Chimneys, Flues, and Masonry Mortar Joints
Brick, stone, and mortar appear indestructible, but water is their ultimate enemy. Mortar joints are deliberately designed to be softer than the surrounding brick so they can absorb structural shifting, but this makes them susceptible to moisture absorption and frost damage.
-
Inspect Mortar Cracks: Walk around your home’s perimeter annually to inspect brick mortar lines. Look for crumbling, powdery mortar or hairline cracks running horizontally through joints. When water enters these cracks and freezes, it expands, causing the hard brick faces to pop off in a process known as spalling.
-
Examine the Chimney Crown: The concrete slab sitting atop your masonry chimney—the crown—is exposed to severe weather. Look for cracks across its surface. A cracked crown allows rainwater to flow down inside the masonry structure, rotting interior framing, rusting metal dampers, and ruining fireplace bricks.
-
Tuckpoint Minor Joints: Scrape out loose, crumbling mortar from damaged joints to a depth of roughly half an inch using a cold chisel or joint rake. Mix a small batch of matching repair mortar, pack it tightly into the cleaned joint using a tuckpointing trowel, and smooth it flush with the surrounding brickwork.
-
Apply Siloxane Sealers: Protect exterior masonry chimneys and walls by spraying them with a breathable, siloxane-based masonry water repellent. Unlike thick paints that trap moisture inside the brick, siloxane sealers allow internal water vapor to escape while causing exterior rainwater to bead up and roll off harmlessly.
Catching Thermal Envelope Leaks and Window Seal Failures

Windows are the primary openings in your home’s thermal shell. Modern energy-efficient windows rely on insulated glass units (IGUs)—two or three panes of glass sealed around a spacer bar filled with insulating argon or krypton gas.
When the perimeter seal of an IGU degrades due to age, thermal expansion, or standing water in the window frame, the insulating gas escapes and moist air enters the space between the panes. The first sign of this failure is a faint hazing, fogging, or visible condensation droplets trapping themselves inside the glass that cannot be wiped away from either side. Left unaddressed, this condensation creates permanent mineral etching across the glass and ruins the window’s insulating value.
In addition to double-pane seal failures, check your window frames for cracked perimeter caulk, deteriorating glazing putty on older wood sashes, and worn weatherstripping along the tracks. Applying fresh silicone caulk around exterior trim and replacing cracked vinyl weatherstripping stops invisible drafts that inflate your monthly heating and cooling bills.
When chimney crowns crumble or mortar joints dissolve, scheduling a timely local chimney repair prevents complete structural rebuilds down the line. Furthermore, when window seals fail or panes crack, calling a specialist for residential glass repair restores your home’s thermal efficiency and protects window frames from hidden rot without requiring the expense of full window replacement.
Managing Micro-Leaks, Pipe Corrosion, and Water Pressure
Preventing interior water damage requires a combination of routine visual inspections and simple mechanical checks.
Start by inspecting every exposed plumbing fixture in your home twice a year. Open the vanity cabinets beneath kitchen and bathroom sinks with a flashlight. Feel along the flexible braided stainless steel supply lines, check the metal shutoff valves for green copper oxidation or white mineral crusting, and run your hand along the PVC P-trap fittings. If a tissue comes away damp after wiping a joint, you have a slow drip that needs attention.
Next, monitor your home’s main water pressure. High water pressure feels great in the shower, but excessive pressure places extreme stress on pipe joints, appliance valves, and water heater tanks. Buy an inexpensive screw-on pressure gauge at your local hardware store and attach it to an outdoor hose bib or laundry sink faucet.
A static reading between 50 and 70 PSI indicates an ideal, safe operating range for residential fixtures. Readings between 70 and 80 PSI represent elevated pressure that warrants close monitoring. If your home’s pressure exceeds 80 PSI, your pressure-reducing valve (PRV) is failing and requires immediate adjustment or replacement to prevent sudden pipe bursts.
Safeguarding On-Site Waste and Sewer Management Systems
Drainage systems rely on gravity and clean pipe interiors to carry wastewater away from your home. Neglecting your drain lines invites foul odors, raw sewage backups, and costly excavation work.
-
Practice Wise Drain Habits: Never pour cooking fats, oils, or grease down kitchen drains. Grease cools inside pipes, creating solid blockages that catch hair and food scraps. Avoid using harsh chemical drain cleaners, as their caustic formulas generate extreme heat that can warp plastic PVC pipes or corrode vintage cast iron lines.
-
Inspect Toilet Internal Components: A running toilet wastes hundreds of gallons of water daily and can fill septic tanks prematurely. Inspect the rubber flapper at the bottom of the tank. If the rubber is soft, slimy, or misshapen, swap it for a new universal flapper immediately.
-
Maintain Drain Cleanouts: Locate your main sewer line cleanout cap—usually a threaded PVC or brass plug near the base of your foundation or in your yard. Ensure the cap is accessible and unscrews easily so you can respond quickly if a main line blockage ever occurs.
-
Monitor Ground Moisture Over Lines: Watch your yard for unusually lush, bright green strips of grass or soft, soggy soil patches above buried sewer or septic lines. These indicators signal an underground pipe crack or joint failure that requires immediate attention before soil collapses into the line.
When under-sink leaks involve corroded metal threads, or when main supply valves refuse to close fully, hiring experienced plumbing companies keeps your pressurized water supply safe and contained. If your home utilizes an on-site waste disposal system, arranging a professional septic repair at the first sign of slow drains or ground pooling prevents dangerous backup events and protects your surrounding soil.
Preserving Air Conditioning Performance and Condensate Management

Air conditioning systems do more than cool your air—they extract massive amounts of water vapor from your home’s indoor atmosphere during hot, humid summer months.
As warm cabin air passes across the cold evaporator coil inside your indoor air handler, moisture condenses out of the air and drips into a plastic drain pan below the coil. This water flows out of your home through a thin PVC condensate drain pipe. Over time, algae, dust, and fungal spores build up inside this drain line, creating a thick gelatinous clog.
When the condensate line plugs up, water overflows the internal drain pan. If your air handler sits in an attic or upper-floor closet, this overflow pours directly down through ceilings and walls, causing severe drywall collapse and structural framing rot.
To prevent condensate overflows, locate the vertical T-pipe cleanout on your PVC drain line near the indoor unit. Pour one cup of plain white distilled vinegar down the line once a month during the cooling season. The acetic acid kills algae growth and keeps the line running free. Additionally, replace your HVAC return air filters every 30 to 90 days. A clogged air filter starves the system of airflow, causing the evaporator coil to freeze solid into a block of ice that melts into an overwhelming flood when the system turns off.
Maintaining Heating Systems and Combustion Safety
Heating systems demand meticulous attention before winter arrives. Neglected furnaces not only fail when temperatures drop below freezing, but they can also leak dangerous carbon monoxide gas into your living spaces.
Begin each fall by performing a visual check of your furnace combustion chamber and burner assembly. Vacuum away accumulated dust and cobwebs around the burner tray. Turn on the system and observe the burner flame through the sight glass. The flame should burn a steady, crisp blue. A yellow, flickering, or wavering flame indicates incomplete fuel combustion, dirty burner jets, or a cracked heat exchanger—a critical safety issue that requires immediate professional evaluation.
Check your furnace condensate drain lines if you operate a high-efficiency condensing unit, as these systems produce acidic water during operation. Inspect the metal flue pipe running from your furnace and water heater to the chimney, making sure all elbow joints are securely fastened with sheet metal screws and free of rust holes.
When your cooling system produces strange buzzing noises, short-cycles constantly, or fails to drop interior temperatures, contacting a reputable local ac repair technician keeps your refrigerant charges balanced and electrical contactors operating smoothly. As winter approaches, scheduling a routine furnace repair ensures your heat exchanger is safe, flame sensors are cleaned, and your heating equipment operates efficiently during the coldest weather.
Monitoring Electrical Safety and Preventing Fixture Overloads
Electrical issues pose a direct fire hazard if ignored. Loose wire splices, corroded outlet terminals, and overloaded circuits generate intense heat that can ignite surrounding wood studs and wall insulation invisibly.
Perform a monthly tactile and visual walk-through of your home’s outlets and wall switches. Place the palm of your hand against cover plates; if a switch or outlet feels warm to the touch, smells like burnt plastic, or exhibits dark scorch marks around the plug slots, turn off the corresponding breaker at your main service panel immediately. Warmth indicates a loose wire connection sparking beneath the plate or an internal contact failure.
Test your Ground Fault Circuit Interrupter (GFCI) outlets monthly by pressing the “Test” button on the faceplate. The button should snap out firmly, cutting power to the outlet face and any downstream outlets on that circuit. Press the “Reset” button to restore power. GFCI outlets installed in high-moisture areas like kitchens, bathrooms, garages, and outdoor locations wear out over time and lose their ability to protect you from electrical shocks.
Pay attention to flickering lights when heavy appliances—such as your air conditioner, refrigerator, or clothes dryer—kick on. While a brief, barely perceptible dim is normal, pronounced or prolonged flickering indicates voltage drops caused by loose neutral connections inside your main service panel or undersized circuit wiring.
Maintaining Private Water Supply and Well Equipment

If your property relies on a private groundwater well rather than a municipal water supply, you are responsible for maintaining your own water pressure, pumping equipment, and purification systems.
The core of a private well system is the pressure tank, which uses an internal rubber bladder to keep water pressurized throughout your plumbing lines. Over time, these rubber bladders can tear, causing the tank to become “waterlogged.” When this happens, the air cushion is lost, and your pump turns on and off rapidly every time you open a faucet—a condition known as short-cycling. Short-cycling overheats the pump motor, burning out control box relays and drastically shortening the lifespan of the expensive submersible pump down in the well bore.
Inspect your pressure tank monthly by tapping its side with your knuckles. The top two-thirds of the tank should sound hollow (containing compressed air), while the bottom third should sound solid (containing water). If the entire tank sounds solid, it is waterlogged and needs air replenishment or bladder replacement.
Check the mechanical pressure switch mounted near the base of the tank. Remove its plastic cover (after turning off the well’s electrical breaker) and look for burnt carbon deposits on the metal contact points or insect nests jammed inside the small pressure sensing tube.
When wall outlets spark, circuit breakers trip repeatedly, or you plan to upgrade major utility panels, hiring licensed electrician services guarantees your electrical system meets current building safety codes. For homeowners managing private water supplies, arranging a professional well pump repair at the first sign of pressure fluctuations, dirty water, or pump short-cycling protects your water delivery and prevents pump motor failure.
Preventative home maintenance is not an overwhelming, endless chore—it is an ongoing habit of mindful ownership. By learning how your home’s systems work, taking time to observe subtle changes, and addressing minor defects early, you protect your household budget from catastrophic emergency expenses.
Remember that fixing a home does not mean doing every single job with your own hands. True preventative care means knowing how to spot small flaws, performing simple low-risk fixes yourself, and building reliable relationships with trusted professionals for complex mechanical, electrical, and structural systems.
Take control of your home’s future today. Walk around your property with a notebook, check your gutter downspouts, inspect your under-sink plumbing, test a few GFCI outlets, and resolve to fix one small issue this weekend. Through consistent attention and proactive care, you will preserve your property’s value, lower your monthly operating costs, and enjoy long-term peace of mind in a safe, comfortable home.